Human Resource Management Software - CBMS ERP HRMS A002

Human Resource Management Software - CBMS ERP HRMS A002
1

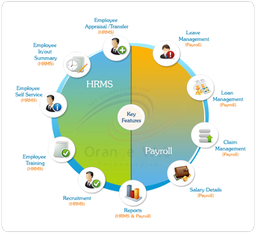
All In One CBMS HRMS
In any organization, the most significant task is that managing their human capital. We have developed an All-in-One HRMS module for efficient management of the human resource in an organization. Our HRMS module helps to manage HR-related activities easily and efficiently. So get the best HRMS at a low cost!
HR Resignation
HR Company Policy
Import Employee Checklists
Overtime Flow With Payslip
Payslip Cancel
Payslip Send By Email
Payslip Dynamic Approval
Payslip Dynamic Cheque
Payslip Whatsapp Integration
HR Dashboard
Employee Promotion
Employee Overtime
Employee Medical Examination
Cancel HR Expense
Employee Idea Management
Employee Entry Exit Checklist
Employee Complain Management
Employee Number Sequence
Employee Mass Tags Update
Mass Update Employee
Employee Own Records
Employee Document Management
Employee Extra Fields
Employee Passport Management
Employee Custom Fields
Key Features


 Features
 Configurations
 Release
 FAQ
FAQ Support
 HR Resignation added.  HR policy added.
Easy to import employee checklist through CSV and XLS file
Manage employee overtime for week days & weekend Add overtime in the salary structure Send payslip to employee's WhatsApp in single click Send by email button to send payslip Auto sends payslip to the employee on confirmation Cancel employee payslip which is in done state Cancel employee's journal entries Set dynamic approvals on payslips Different approvals on different payslips. Notification when payslip approves or rejects. Create a dynamic cheque. Customize Cheque as your requirement. HR Dashboard to enhance employee performance Manage employee visa/passport Manage employees using sequence numbers Update tags in Employees Update multiple employees Employees can share own ideas Add extra fields in employee form view Add custom tab in employee form view Add custom field in employee form view. Employee checklist Employee checklist template Manage employee's documents. Track every details of employees Employee can see his/her record or profile Employees can share complains with organization
Cancel employee expenses Manage & analyze employee overtime Manage employee promotion process Manage employee medical information
- Mass Leave Request Approval
- Cancel HR Expense
- Employee Idea
- Employee Entry Exit Checklist
- Employee Own Checklist
- Employee Complain
- Employee Number Sequence
- Employee Mass Tags Update
- Mass Update Employee
- Employee Own Records
- Employee Document
- Employee Extra Fields
- Employee Visa/Passport
- Employee Custom Fields
- Leave Notifications
- Payslip Cancel
- Payslip Send By Email
- Payslip Dynamic Approval
- Payslip Dynamic Cheque
- Payslip Whatsapp Integration

These screenshots are taken in Odoo 16 version. We will be updating new screenshots & video in the near future. If you have any queries, please feel free to reach out to us at support
Enable "Employee Resignation".

Go to the "Resignation Management" menu.

User can post their resignation request.

When the user post their request it will be moved to the "Waiting For Approval" stage.

The request is sent to the department manager through email.

Manager can approve or refuse resignation request.

When the department manager click on the "Approve" or "Refuse" one wizard will opens, Here they can enter comment.

The employee who request for resignation get an email when the responsible user approved/refused the request.

Manager can close the request after approved.

User can also reset the request to draft stage from close stage.

Department manager can filter all request according to its stages.

Some predefined Groupby options to sort the request.

Go to settings => companies and define company policy.

Go to the department configuration and define policy for every departments.

When creating a employee contract the policy will set by default related with its respective company.

When creating a employee contract the policy will set by default related with its respective department.

Policy display in dashboard.

You can see policy from the dashboard.

Manager Dashboard
Set "Administrator" in the employees.

"Manager" Dashboard" looks like below, Manager can see leaves, attendances, contracts & expenses and all from dashbaord.

When you press the "Leaves" button it opens the employee leaves.

Now we open attendance.
Employee attendance view looks like this.

Manager can see employee expenses from here.

Expenses of employee with employee filter.

Now we open contracts.
Employee contracts with details.

Manager can see employee leaves, attendances & expenses directly from the dashboard.


Employee Dashboard
Enable "HR Dashboard" in the HRMS configurations.

"HR Dashboard" looks like below, you can see leave and attendance details, contracts report, employee expenses, payslip, birthday, anniversary, announcement menu.

When you press the "Payslip" button it opens the payslips list view.

When you press the "Leaves" button it opens the leaves list view.

When you press the "Attendance" button it opens the attendance list view.

When you press the "Contract" button it opens the contract list view.

When you press the "Expense" button it opens the expense list view.

You get all the detail related employee birthday, anniversary & announcement from here.

It opens the announcements list view when you click there.

The announcements form view look like this, here the HR manager or officer can manage sequence of that or can remove announcement.

"Payslip" and "Expense" in the dashboard with details.

"Attendance" and "Leave" in the dashboard with details.

Set managers for employees.

Select related user.

Go to "Settings" => "Users & Companies" set user access.

The overtime request form view.

The manager gets an email notification when the request creates.

Set manager access rights for the manager.

The overtime approve request list view.

The overtime approve request form view.

The employee gets an email notification when the request is approved/rejected.

The request rejected by the manager.

If the request is rejected then it generates a popup for reason.

The employee gets an email notification when the request is approved/rejected.

The employee can see rejected request reason.

Enable "Employee Medical Examination" group.

Go to employee => configuration, select user/person whom you want to notify & choose before days expired employee medical examination.

Go to employee => medical information and enter the details.


Email notification of expiring employee medical examination looks like below.

The medical examination information list view.

Employee medical examination information form view.

You can group by medical examination by the employee & medical type.

You can configure the employee medical type from the employee => configuration.

Enter the "Medical Type" name and press the save button.

Enable "Employee Promotion" in the HRMS configurations.

Go to users, choose employees => "Administrator".

Go to the configuration => Employee promotion to create employee promotion, employee promotion list view looks like this.

Now go to employees, Admin can see employee total promotion list from the smart button "Employee Promotion".

Press the "Create" button to create employee promotion.

Choose details and press the "Save" button.

Admin can print all employee promotion reports.

Employee promotion report looks like this.

Admin can see employee promotion from the "Employee Promotion" menu and from the "Employee Promotion" smart button.

The employee promotion form view looks like this.

Go to users, choose employees => "Officer".

Officers can see their promotion from the "Employee Promotion" menu and from the "Employee Promotion" smart button.

An employee/officer can see their own promotion only.

An employee/officer can print own promotion report.

Go to the "Attendances".

Now go to the "Manager" => "Attendances".

When any check-in/check-out or any new entry creates, it will show in the attendance chatter.

Enable "Employee Mass Approve Leave" in the HRMS configurations.

Select the leave requests from the list view and then from the "Action" menu select "First Approval".

Select the leave requests from the list view and then from the "Action" menu select "Second Approval".

Mass leave requests approved.

Tick the "Expense Cancel Feature" to cancel expenses.

Option-1
When you want to cancel the expenses only then choose the "Cancel Only" option.

We cancel paid expense.

Now press the "Cancel" button.

When you cancel the expense then the expense is cancelled and the state is changed to "refused".

Option-2
When you want to cancel the expenses and reset to the draft state tick "Cancel and Reset to Draft".

We cancel paid expense.

Now press the "Cancel" button.

When you cancel the expense then the expense is cancelled and the expense is reset to the draft.

Option-3
When you want to cancel & delete the expenses then choose the "Cancel and Delete" option.

We cancel paid expense.

Now press the "Cancel" button.

After the "Cancel" the expense will be deleted.

Option-4
Now we cancel multiple expenses from the tree view.

All selected expenses are cancelled.

Now we "cancel & reset draft" multiple expenses from the tree view.

All selected expenses are cancelled and reset to the draft.

Now we "cancel & delete" multiple expenses from the tree view.

All expenses will be deleted after cancelled.

Enable "Employee Idea" in the HRMS configurations.

Go to the "Configuration" => "Idea Category" menu to create it.

"Idea Category" form view, you can create idea category with the department and responsible person.

Idea form view, fill details and post idea.

After post ideas, a responsible person gets mail about that.

A responsible person can approve/refuse idea.

A responsible person can give ratings and comment about the decision.

Approve/refuse idea shown as below.

The employee gets approved/refused complains mail.

After approve, refuse or cancel complains, the user can repost complain using "Set To Draft".

Enable "Employee Checklist" in the HRMS configurations.

Create Employee Entry Checklist and Description.

Employee Entry Checklist list available in Employee.

Create Employee Exit Checklist and Description.

Employee Exit Checklist list available in Employee.

Select Employee Entry Checklist that are completed, based on that Entry Checklist percentage calculated.

Select Employee Exit Checklist that are completed, based on that Exit Checklist percentage calculated.

Employee Entry & Exit Checklist Completed Percentage on List view.

Employee Entry & Exit Checklist Completed Percentage on Kanban View.

Import checklist menu.

Import checklist wizard, select file type & upload file. You can download sample sheet from here.

Click apply after the file is uploaded.

Success message looks like below it's shows successfully imported records.

Following checklists are imported.

Enable "Employee Custom Checklist" in the HRMS configurations.

Create Employee Entry Checklist and Description.

Employee Entry Checklist list available in Employee.

Create Employee Exit Checklist and Description.

Employee Exit Checklist list available in Employee.

Select Employee Entry Checklist that are completed with State New,Completed and Cancelled, based on that Entry Checklist percentage calculated.Click on Check Icon To Complete Checklist.Cancel Icon to Cancel Checklist.

Select Employee Exit Checklist that are completed with State New,Completed and Cancelled, based on that Exit Checklist percentage calculated.Click on Check Icon To Complete Checklist.Cancel Icon to Cancel Checklist.

Employee Entry & Exit Checklist Completed Percentage on List view.

Employee Entry & Exit Checklist Completed Percentage on Kanban View.

Go to the "Configuration" => Employee Entry Checklist Template.

Now we create employee entry checklist template, checklist template form view looks like this.

Employee entry checklist template list view looks like this.

Now we fill the checklist by selecting the checklist template.

When we select checklist template, it adds a record by default.

Go to the "Configuration" => Employee Exit checklist Template.

Now we create employee exit checklist template, checklist template form view looks like this.

Employee exit checklist template list view looks like this.

Now we fill the checklist by selecting the checklist template.

When we select checklist template, it adds a record by default.

Import checklist menu.

Import checklist wizard, select file type & upload file. You can download sample sheet from here.

Click apply after the file is uploaded.

Success message looks like below it's shows successfully imported records.

Following checklists are imported.

Enable "Employee Complain" in the HRMS configurations.

Go to the "Configuration" => "Effect On" menu to create an effect on.

"Effect On" form view.

Go to the "Configuration" => "Complain Category" menu to create the complain category.

"Complain Category" form view, you can create a complain category with the department and responsible person.

Complain form view, fill details and post complain.

After post complains, a responsible person gets mail about that.

You can print the complain PDF report after post it.

The complain PDF report.

A responsible person can give ratings and comment about the decision.

Resolve/refuse complain shown as below.

The employee gets resolved/refused complains mail.

The complain PDF report.

After resolve, refuse or close complains, the user can repost complain using "Set To Draft".

Enable "Employee Sequence" in the HRMS configurations.

Press "Generate" to automatically generate the employee number.

Employee form view with the employee sequence number.

Employees kanban view with the employee sequence number.

Employees list view with the employee sequence number.

Tick "Auto Create Employee No." to assign sequence numbers automatically to new employees.

Now we create a new employee.

It generates employee numbers automatically.

You can allocate multiple employees to sequence numbers in a single click in the list view.

Select employees from the list view to allocate sequence numbers.

Employees kanban view with the employee sequence number.

You can change employee sequence number patterns.

You can set the employee sequence number pattern from here.

Employee sequence number pattern changed.

Enable "Employee Mass Tags" in the HRMS configurations.

Update Employees Tags menu and wizard in Employees.

Employees Tag updated.

Select employees and go to action --> Update Employees Tags

Update tags wizard.

Employees Tags updated.

Enable "Employee Mass Update Manager" in the HRMS configurations.

Select the employees from the list view and then from the "Action" menu select "Update Mass Manager".

After that one wizard opens, you can update multiple employee's job positions and managers from here.

Mass employees updated.

Enable "Employee Own Record" in the HRMS configurations.

Set related user in employee.

When employee user login, can see only own employee record.

Set employee as a "Manager" to other employee.

When manager user login, manager can see own record and all other related employees.

Tick the "Access Employee Document" group.

Now go to the employee and attach the document.

You can see the document without download using the document smart button.

After press on the document smart button, it opens the document kanban view.

In the document form view tick, the "Expiry Date Notify?" to get expiry date email notification.

You can see the document without download that document.

You can send email notifications to multiple employees using the "Notify Email" option.

You can send the notification manually by modifying scheduled actions.

Manually sends email notifications without scheduled actions.

The email notification form view looks like this, you can see the document from here.

You can send multiple employee emails manually also.

Tick the "Notify Employee" to send document expiry notification to the employee only.

Email notification list view.

Email notification form view, you can also see the document from here.

You have to tick "Expiry Date Notify?" to get an email notification on the expiry date.

Tick/untick "On Expiry Date Notification" to enable/disable email notification on the expiry date.

It sends email notifications based on the configuration.

The email notification form view looks like this.

The email notification kanban view looks like this.

Enable "Employee Extra Fields" in the HRMS configurations.

You can add extra fields like a reference by & work country.

You can add extra fields like previous nationality, passport detail, blood group, age.

You can add fields like religion, height-weight.

You can add fields like dates(joining date, employment date, confirmation date, marriage date), social media detail, job type, PF account no, facility details.

You can add extra fields like certifications.

You can add employee relation fields.

Relation form view, You can manage employee relations from here.

Employee relation fields are added in the employee emergency contact details.

You can add a field like a personal email address in the private information.

Enable "Employee Passport" in the HRMS configurations.

Go to employee => configuration, select user/person whom you want to notify & choose before days expired visa.

Go to employee => visa information, enter details, and if passport expired then it shows the red color alert in the right corner of your employee form view.

Email notification of expiring employee visa looks like below.

Employee visa information list view.

Employee visa information form view.

You can group by visa information by employee, application date & status.

Group by visa information by employee.

You can group by visa information by application date like day, week, month, quarter & year.

Group by visa information by status.

Enable "Employee Custom Fields" in the HRMS configurations.

Click on the "Add Custom Field" & 'Add Custom Tab' button to add a new field & tab in the employee form view.

After click that button one wizard will popup. where you can set tab name, label, groups, tab, and position and click 'Create Tab'.

'Other Info' Tab is created.

For adding the field in custom tab click 'Add custom field' and add field name, label, type, tab(Other Info) and click 'Create field'.

Boolean custom field added to form.

Binary widget added (Binary widget useful to give more than 1 one attachments).

Binary widget added.

Set type as a char and widget email.

The char field with "email" widget added to form.

Set type as a char and widget phone.

The char field with "phone" widget added to form.

Date field set to copied "True".

Date field added.

Datetime field set to copied "True".

Datetime field added.

Float: Float time widget added to track time (hours: minutes).

Float time widget added.

Html type added which will be useful to get an HTML interface.

Html feature added.

Integer type added.

Integer value added.

Many to many fields with model and widget and access rights set to the given group.

Many to many: This feature added for many to many fields. this will help you to filter records of the selected model. let's say you have selected contacts model and you want to filter only customers. so you can easily do using this feature.

Checkboxes: This feature added to select multiple values from the model. in this, you will see all options with a tickbox. you can tick multiple items.

Many to many of Checkbox's outputs looks like below.

Many to many: Binary widget added.

Binary widget added (Binary widget useful to give more than 1 one attachments).

Many to one: Selection widget added.

Selection widget added.

Set type as selection and enter options as per requirement, widget set to the radio.

The selection field with "radio" widget added to form.

Priority: This feature added to add a priority view.

The selection field with "priority" widget added to form.

Color field added.

Color field added for a selection of different colors.

Signature field with access rights.

Signature field added.

'Employee Custom Field' & 'Employee Custom Tab' menu in the configuration. where you can see the list of the custom tab & custom fields.

Enable "Employee Leave Notification" in the HRMS configurations.

Assign Work Email to employee, employee will get leave reply on this email. Set Manager of employee, this manager will receive leave request email. e.g Hr Manager.

For Hr Manager set Work Email, he will get leave request on this email. Employee will leave reply from this email.

Leave Request created by Employee.

Hr Manager got leave request email from employee, with leave details mentioned. On "View Leave" button click, he will redirected to that leave request.

Hr Manager can see leave request. He can either approve or refuse request.

On "Approve" button click, leave is approved.

Employee get reply from Hr Manger about leave approval.

If Hr Manager refused any leave.

Employee get email notification about refusal of leave request.

Tick "Enable Automatic Leave Summary" and choose weekly, monthly or both to send leaves email.

Leave request list view with total leaves.

Now we run schedule actions.

As per configuration leave email sent.

Enable "Payslip Cancel Feature".
 Option 1: Your Journal Not Allow Cancelling Entries
Currently, the journal has not allowed canceling entries.

Now make payslip and confirm it.

After journal entry is created, you can see a list view of a journal entry.

The journal entry form view looks like below.

Now, In payslip press button "Cancel Payslip".

After cancel payslip than it makes the reversal entry of payslip.

If you cancel payslip that state is set to reject.

A reversal journal entry form view.
 Option 2: Your Journal Allow Cancelling Entries
Currently, the journal has allowed canceling entries.

Now make payslip and confirm it.

After journal entry is created, you can see a list view of a journal entry.

The journal entry form view looks like below.

You can cancel the payslip based on the reference number so press button "Cancel Payslip".

Payslip state set to rejected.

We have canceled payslip so it shows journal entry empty.
 "Refund Payslip" Field Feature
Now make payslip and confirm it.

Press the button "Refund" in payslip.

Payslip list view.

You can see the "Refunded Payslip" field it shows detail if the payslip is refunded.

Enable "Payslip Send Payslip" in configurations.

After creating a payslip, on the "Confirm" button click, payslip will auto-sent in the email to that employee.

It shows an error if you have not allowed "send payslip" for that employee.

Inside employee set "Send Payslip" to true.

When you press the "Send Email" button, this pop-up will open to sent payslip to an employee., user can modify that template.

You can send multiple payslips to employees at a time from the list view by the "Send Payslip" button.

After that popup opens, press the "Send Email" button.

Payslip sent to the employee.

Payslip looks like this.

Enable "Payslip Dynamic Approval" in configuration.

Approval configuration menu.

Approval Configuration: Setup approval levels based on minimum amount and users level. Also select companies.

Approved Process By, there are two types 1. User , 2. Group. Userwise means to define that person who approved the payslips, in this wizard select the user.

Approve type 2. Group that means only specific groups users will give approval.

User submits payslip for approval by pressing the âConfirmâ button. so that the payslip will automatically set the âWaiting for Approvalâ stage. Auto fetch Approval Level based on configured approvals setup and minimum limit.

After confirmed by the user, Auto set next level approvers in the Approval Info tab. If next approval is required.

Email notification sent to approvers for approval payslip.

The "My Approval" menu shows payslip only those payslips are assigned to him.

Approval Flow
There are 2 approvers the first approver approves the payslip.

After approved by the approved person, Auto set the next level approvers in the Approval Info tab. If next approval is required.

Email notification sent to approvers for approval payslip.

Now the second approver approves the payslip.

So payslip is done.

Email notification sent to approvers for approval payslip.

Rejection Flow
There are 2 approvers If the first approver rejects the payslip that means that payslip will be canceled no more second approver is needed.

After click on the âRejectâ button, this wizard will pop up, here the approver has to add a reason for rejecting the payslip.

After rejection, it auto set the rejection information in the "Reject Order Info".

Email notification of rejection looks like this.

User gets a notification when a payslip approves or rejects.

Enable "Payslip Dynamic Cheque" in configuration.

'Cheque Format' all configuration.

The configuration output looks like below.

'Cheque Format' submenu in the payroll configuration menu and tree view.

'Cheque Format' form view, you can choose fields like,
Print Check Border:
You can configure border width and border color.
Print Partner:
If you select this checkbox then it's a print partner in the cheque. You can configure font (bold, width, color, size) and can configure partner with title and spacing.
Configuration

Output

You can choose fields like,
Print Date:
If you select this then it's a print date in the cheque. Using separator, date & year Format, date spacing you can configure date.
Date Digit From Left:
You can configure using date letter spacing, font size & color.
Amount In Digit:
If you select this then it's a print amount, currency and star in the cheque. You can configure amount spacing, font size & color.
Amount In Words:
If you select this then it's a print amount words & star in the cheque. You can configure font bold, size, color & Spacing.
Configuration

Output

You can choose fields like,
Print Company:
If you select this then it's a print company in the cheque. You can configure company spacing, font size & color.
Print Cheque No:
If you select this then it's a print chequ no in the cheque. You can configure font size & color.
Print Short Code:
If you select this then it's a print short code in the cheque. You can configure font size & color.
Print Bank Address:
If you select this then it's a print bank address in the cheque. You can configure font size & color.
Print Account Number:
If you select this then it's a print account no in the cheque. You can configure font size & color.
Configuration

Output

You can choose fields like,
Print First Signature:
If you select this then it's a print signature in the cheque.
Print Free Text One:
If you select this then it's a print free text one in the cheque. You can configure free text one spacing, font size & color.
Configuration

Output

You can choose fields like,
Print Free Text Two:
If you select this then it's a print free text two in the cheque. You can configure free text two spacing, font size & color.
Print Free Text Three:
If you select this then it's a print free text three in the cheque. You can configure free text three spacing, font size & color.
Extra Information:
If you select this then it's a print payment & journal information in the cheque.
Configuration

Output

Go to Payments and select appropriate Cheque Format,Bank, Employee Title, Add Cheque No, Add free text.

You can edit bank name, id no, logo & address.

You can print a cheque from the "Print" option.

"Payslip Dynamic Cheque" print looks like below.

In "User", enable the "Hr Payroll Whatsapp Feature" option. Users can easily send a message to anyone using that menu. This menu will be visible when the user has the SWQ group enable.

Payroll Whatsapp configuration setting, Here we enable payroll information & report URL in the message.

Send payslip in WhatsApp to the employee.

Edit Message as your requirement and click send.

If the contact number not available then this popup opens.

The payroll WhatsApp message looks like this.

Now we enable signature for show signature in the message.

Set the signature in the message,
1) Go to Preferences.

2) Add Signature.

Now we send payslip in WhatsApp to the employees and edit Message and click send.

The payroll WhatsApp message looks like this.

Tick the checkbox to enable auto-checkout, User can define checkout interval time.

Schedule actions for auto-checkout.

Enable "Write Checkout DateTime Same As Checkin".

Checkout datetime same as checkin.

Overtime configuration for weekdays.

Overtime weekdays list view with an hourly rate.

Overtime configuration for weekend.

Overtime weekend list view with an hourly rate.

Overtime request form view.

Admin approve overtime request.

Now in the payslip select contract.

You can set overtime in the salary structure.

The salary structure with overtime.

The salary computation with overtime.

Now employee send overtime request on weekend.

Weekend overtime request approved by manager.

Salary compute based on configuration.

Payslip with weekend overtime.

Version 17.0.1 |Released on : 25th November 2023
- Initial Release
Is this app compatible with Odoo Community as well as Enterprise?
- No, This app works perfectly with Odoo Community only.
I want some customization in this theme. How can I request it?
- Please Contact Us at sales@cbms.ng to request customization.
Do i get free support?
- Yes, we provide free support for 100 days.
Do i get free updates?
- Yes, you will get free update for lifetime.
Do we need to install any additional libraries/modules for using this module?
- Yes, you need to install external libraries 'pdfminer'
Command : pip3 install pdfminer
Do I have to buy my module for each version?
- Yes, You have to download module for each version (13,14,15) except in version 12 or lower.
What If I purchase Module In Wrong Version Can I exchange Module With Other Versions?
- No, We do not provide any kind of exchange.
If you need suuport please raise your ticket at support@cbms.ng
All In One CBMS HRMS
In any organization, the most significant task is that managing their human capital. We have developed an All-in-One HRMS module for efficient management of the human resource in an organization. Our HRMS module helps to manage HR-related activities easily and efficiently. So get the best HRMS at a low cost!
HR Resignation
HR Company Policy
Import Employee Checklists
Overtime Flow With Payslip
Payslip Cancel
Payslip Send By Email
Payslip Dynamic Approval
Payslip Dynamic Cheque
Payslip Whatsapp Integration
HR Dashboard
Employee Promotion
Employee Overtime
Employee Medical Examination
Cancel HR Expense
Employee Idea Management
Employee Entry Exit Checklist
Employee Complain Management
Employee Number Sequence
Employee Mass Tags Update
Mass Update Employee
Employee Own Records
Employee Document Management
Employee Extra Fields
Employee Passport Management
Employee Custom Fields
Key Features
HR Resignation added. HR policy added.
Easy to import employee checklist through CSV and XLS file
Manage employee overtime for week days & weekend Add overtime in the salary structure Send payslip to employee's WhatsApp in single click Send by email button to send payslip Auto sends payslip to the employee on confirmation Cancel employee payslip which is in done state Cancel employee's journal entries Set dynamic approvals on payslips Different approvals on different payslips. Notification when payslip approves or rejects. Create a dynamic cheque. Customize Cheque as your requirement. HR Dashboard to enhance employee performance Manage employee visa/passport Manage employees using sequence numbers Update tags in Employees Update multiple employees Employees can share own ideas Add extra fields in employee form view Add custom tab in employee form view Add custom field in employee form view. Employee checklist Employee checklist template Manage employee's documents. Track every details of employees Employee can see his/her record or profile Employees can share complains with organization
Cancel employee expenses Manage & analyze employee overtime Manage employee promotion process Manage employee medical information
- Mass Leave Request Approval
- Cancel HR Expense
- Employee Idea
- Employee Entry Exit Checklist
- Employee Own Checklist
- Employee Complain
- Employee Number Sequence
- Employee Mass Tags Update
- Mass Update Employee
- Employee Own Records
- Employee Document
- Employee Extra Fields
- Employee Visa/Passport
- Employee Custom Fields
- Leave Notifications
- Payslip Cancel
- Payslip Send By Email
- Payslip Dynamic Approval
- Payslip Dynamic Cheque
- Payslip Whatsapp Integration
These screenshots are taken in Odoo 16 version. We will be updating new screenshots & video in the near future. If you have any queries, please feel free to reach out to us at support
Enable "Employee Resignation".
Go to the "Resignation Management" menu.
User can post their resignation request.
When the user post their request it will be moved to the "Waiting For Approval" stage.
The request is sent to the department manager through email.
Manager can approve or refuse resignation request.
When the department manager click on the "Approve" or "Refuse" one wizard will opens, Here they can enter comment.
The employee who request for resignation get an email when the responsible user approved/refused the request.
Manager can close the request after approved.
User can also reset the request to draft stage from close stage.
Department manager can filter all request according to its stages.
Some predefined Groupby options to sort the request.
Go to settings => companies and define company policy.
Go to the department configuration and define policy for every departments.
When creating a employee contract the policy will set by default related with its respective company.
When creating a employee contract the policy will set by default related with its respective department.
Policy display in dashboard.
You can see policy from the dashboard.
Manager Dashboard
Set "Administrator" in the employees.
"Manager" Dashboard" looks like below, Manager can see leaves, attendances, contracts & expenses and all from dashbaord.
When you press the "Leaves" button it opens the employee leaves.
Now we open attendance.
Employee attendance view looks like this.
Manager can see employee expenses from here.
Expenses of employee with employee filter.
Now we open contracts.
Employee contracts with details.
Manager can see employee leaves, attendances & expenses directly from the dashboard.
Employee Dashboard
Enable "HR Dashboard" in the HRMS configurations.
"HR Dashboard" looks like below, you can see leave and attendance details, contracts report, employee expenses, payslip, birthday, anniversary, announcement menu.
When you press the "Payslip" button it opens the payslips list view.
When you press the "Leaves" button it opens the leaves list view.
When you press the "Attendance" button it opens the attendance list view.
When you press the "Contract" button it opens the contract list view.
When you press the "Expense" button it opens the expense list view.
You get all the detail related employee birthday, anniversary & announcement from here.
It opens the announcements list view when you click there.
The announcements form view look like this, here the HR manager or officer can manage sequence of that or can remove announcement.
"Payslip" and "Expense" in the dashboard with details.
"Attendance" and "Leave" in the dashboard with details.
Set managers for employees.
Select related user.
Go to "Settings" => "Users & Companies" set user access.
The overtime request form view.
The manager gets an email notification when the request creates.
Set manager access rights for the manager.
The overtime approve request list view.
The overtime approve request form view.
The employee gets an email notification when the request is approved/rejected.
The request rejected by the manager.
If the request is rejected then it generates a popup for reason.
The employee gets an email notification when the request is approved/rejected.
The employee can see rejected request reason.
Enable "Employee Medical Examination" group.
Go to employee => configuration, select user/person whom you want to notify & choose before days expired employee medical examination.
Go to employee => medical information and enter the details.
Email notification of expiring employee medical examination looks like below.
The medical examination information list view.
Employee medical examination information form view.
You can group by medical examination by the employee & medical type.
You can configure the employee medical type from the employee => configuration.
Enter the "Medical Type" name and press the save button.
Enable "Employee Promotion" in the HRMS configurations.
Go to users, choose employees => "Administrator".
Go to the configuration => Employee promotion to create employee promotion, employee promotion list view looks like this.
Now go to employees, Admin can see employee total promotion list from the smart button "Employee Promotion".
Press the "Create" button to create employee promotion.
Choose details and press the "Save" button.
Admin can print all employee promotion reports.
Employee promotion report looks like this.
Admin can see employee promotion from the "Employee Promotion" menu and from the "Employee Promotion" smart button.
The employee promotion form view looks like this.
Go to users, choose employees => "Officer".
Officers can see their promotion from the "Employee Promotion" menu and from the "Employee Promotion" smart button.
An employee/officer can see their own promotion only.
An employee/officer can print own promotion report.
Go to the "Attendances".
Now go to the "Manager" => "Attendances".
When any check-in/check-out or any new entry creates, it will show in the attendance chatter.
Enable "Employee Mass Approve Leave" in the HRMS configurations.
Select the leave requests from the list view and then from the "Action" menu select "First Approval".
Select the leave requests from the list view and then from the "Action" menu select "Second Approval".
Mass leave requests approved.
Tick the "Expense Cancel Feature" to cancel expenses.
Option-1
When you want to cancel the expenses only then choose the "Cancel Only" option.
We cancel paid expense.
Now press the "Cancel" button.
When you cancel the expense then the expense is cancelled and the state is changed to "refused".
Option-2
When you want to cancel the expenses and reset to the draft state tick "Cancel and Reset to Draft".
We cancel paid expense.
Now press the "Cancel" button.
When you cancel the expense then the expense is cancelled and the expense is reset to the draft.
Option-3
When you want to cancel & delete the expenses then choose the "Cancel and Delete" option.
We cancel paid expense.
Now press the "Cancel" button.
After the "Cancel" the expense will be deleted.
Option-4
Now we cancel multiple expenses from the tree view.
All selected expenses are cancelled.
Now we "cancel & reset draft" multiple expenses from the tree view.
All selected expenses are cancelled and reset to the draft.
Now we "cancel & delete" multiple expenses from the tree view.
All expenses will be deleted after cancelled.
Enable "Employee Idea" in the HRMS configurations.
Go to the "Configuration" => "Idea Category" menu to create it.
"Idea Category" form view, you can create idea category with the department and responsible person.
Idea form view, fill details and post idea.
After post ideas, a responsible person gets mail about that.
A responsible person can approve/refuse idea.
A responsible person can give ratings and comment about the decision.
Approve/refuse idea shown as below.
The employee gets approved/refused complains mail.
After approve, refuse or cancel complains, the user can repost complain using "Set To Draft".
Enable "Employee Checklist" in the HRMS configurations.
Create Employee Entry Checklist and Description.
Employee Entry Checklist list available in Employee.
Create Employee Exit Checklist and Description.
Employee Exit Checklist list available in Employee.
Select Employee Entry Checklist that are completed, based on that Entry Checklist percentage calculated.
Select Employee Exit Checklist that are completed, based on that Exit Checklist percentage calculated.
Employee Entry & Exit Checklist Completed Percentage on List view.
Employee Entry & Exit Checklist Completed Percentage on Kanban View.
Import checklist menu.
Import checklist wizard, select file type & upload file. You can download sample sheet from here.
Click apply after the file is uploaded.
Success message looks like below it's shows successfully imported records.
Following checklists are imported.
Enable "Employee Custom Checklist" in the HRMS configurations.
Create Employee Entry Checklist and Description.
Employee Entry Checklist list available in Employee.
Create Employee Exit Checklist and Description.
Employee Exit Checklist list available in Employee.
Select Employee Entry Checklist that are completed with State New,Completed and Cancelled, based on that Entry Checklist percentage calculated.Click on Check Icon To Complete Checklist.Cancel Icon to Cancel Checklist.
Select Employee Exit Checklist that are completed with State New,Completed and Cancelled, based on that Exit Checklist percentage calculated.Click on Check Icon To Complete Checklist.Cancel Icon to Cancel Checklist.
Employee Entry & Exit Checklist Completed Percentage on List view.
Employee Entry & Exit Checklist Completed Percentage on Kanban View.
Go to the "Configuration" => Employee Entry Checklist Template.
Now we create employee entry checklist template, checklist template form view looks like this.
Employee entry checklist template list view looks like this.
Now we fill the checklist by selecting the checklist template.
When we select checklist template, it adds a record by default.
Go to the "Configuration" => Employee Exit checklist Template.
Now we create employee exit checklist template, checklist template form view looks like this.
Employee exit checklist template list view looks like this.
Now we fill the checklist by selecting the checklist template.
When we select checklist template, it adds a record by default.
Import checklist menu.
Import checklist wizard, select file type & upload file. You can download sample sheet from here.
Click apply after the file is uploaded.
Success message looks like below it's shows successfully imported records.
Following checklists are imported.
Enable "Employee Complain" in the HRMS configurations.
Go to the "Configuration" => "Effect On" menu to create an effect on.
"Effect On" form view.
Go to the "Configuration" => "Complain Category" menu to create the complain category.
"Complain Category" form view, you can create a complain category with the department and responsible person.
Complain form view, fill details and post complain.
After post complains, a responsible person gets mail about that.
You can print the complain PDF report after post it.
The complain PDF report.
A responsible person can give ratings and comment about the decision.
Resolve/refuse complain shown as below.
The employee gets resolved/refused complains mail.
The complain PDF report.
After resolve, refuse or close complains, the user can repost complain using "Set To Draft".
Enable "Employee Sequence" in the HRMS configurations.
Press "Generate" to automatically generate the employee number.
Employee form view with the employee sequence number.
Employees kanban view with the employee sequence number.
Employees list view with the employee sequence number.
Tick "Auto Create Employee No." to assign sequence numbers automatically to new employees.
Now we create a new employee.
It generates employee numbers automatically.
You can allocate multiple employees to sequence numbers in a single click in the list view.
Select employees from the list view to allocate sequence numbers.
Employees kanban view with the employee sequence number.
You can change employee sequence number patterns.
You can set the employee sequence number pattern from here.
Employee sequence number pattern changed.
Enable "Employee Mass Tags" in the HRMS configurations.
Update Employees Tags menu and wizard in Employees.
Employees Tag updated.
Select employees and go to action --> Update Employees Tags
Update tags wizard.
Employees Tags updated.
Enable "Employee Mass Update Manager" in the HRMS configurations.
Select the employees from the list view and then from the "Action" menu select "Update Mass Manager".
After that one wizard opens, you can update multiple employee's job positions and managers from here.
Mass employees updated.
Enable "Employee Own Record" in the HRMS configurations.
Set related user in employee.
When employee user login, can see only own employee record.
Set employee as a "Manager" to other employee.
When manager user login, manager can see own record and all other related employees.
Tick the "Access Employee Document" group.
Now go to the employee and attach the document.
You can see the document without download using the document smart button.
After press on the document smart button, it opens the document kanban view.
In the document form view tick, the "Expiry Date Notify?" to get expiry date email notification.
You can see the document without download that document.
You can send email notifications to multiple employees using the "Notify Email" option.
You can send the notification manually by modifying scheduled actions.
Manually sends email notifications without scheduled actions.
The email notification form view looks like this, you can see the document from here.
You can send multiple employee emails manually also.
Tick the "Notify Employee" to send document expiry notification to the employee only.
Email notification list view.
Email notification form view, you can also see the document from here.
You have to tick "Expiry Date Notify?" to get an email notification on the expiry date.
Tick/untick "On Expiry Date Notification" to enable/disable email notification on the expiry date.
It sends email notifications based on the configuration.
The email notification form view looks like this.
The email notification kanban view looks like this.
Enable "Employee Extra Fields" in the HRMS configurations.
You can add extra fields like a reference by & work country.
You can add extra fields like previous nationality, passport detail, blood group, age.
You can add fields like religion, height-weight.
You can add fields like dates(joining date, employment date, confirmation date, marriage date), social media detail, job type, PF account no, facility details.
You can add extra fields like certifications.
You can add employee relation fields.
Relation form view, You can manage employee relations from here.
Employee relation fields are added in the employee emergency contact details.
You can add a field like a personal email address in the private information.
Enable "Employee Passport" in the HRMS configurations.
Go to employee => configuration, select user/person whom you want to notify & choose before days expired visa.
Go to employee => visa information, enter details, and if passport expired then it shows the red color alert in the right corner of your employee form view.
Email notification of expiring employee visa looks like below.
Employee visa information list view.
Employee visa information form view.
You can group by visa information by employee, application date & status.
Group by visa information by employee.
You can group by visa information by application date like day, week, month, quarter & year.
Group by visa information by status.
Enable "Employee Custom Fields" in the HRMS configurations.
Click on the "Add Custom Field" & 'Add Custom Tab' button to add a new field & tab in the employee form view.
After click that button one wizard will popup. where you can set tab name, label, groups, tab, and position and click 'Create Tab'.
'Other Info' Tab is created.
For adding the field in custom tab click 'Add custom field' and add field name, label, type, tab(Other Info) and click 'Create field'.
Boolean custom field added to form.
Binary widget added (Binary widget useful to give more than 1 one attachments).
Binary widget added.
Set type as a char and widget email.
The char field with "email" widget added to form.
Set type as a char and widget phone.
The char field with "phone" widget added to form.
Date field set to copied "True".
Date field added.
Datetime field set to copied "True".
Datetime field added.
Float: Float time widget added to track time (hours: minutes).
Float time widget added.
Html type added which will be useful to get an HTML interface.
Html feature added.
Integer type added.
Integer value added.
Many to many fields with model and widget and access rights set to the given group.
Many to many: This feature added for many to many fields. this will help you to filter records of the selected model. let's say you have selected contacts model and you want to filter only customers. so you can easily do using this feature.
Checkboxes: This feature added to select multiple values from the model. in this, you will see all options with a tickbox. you can tick multiple items.
Many to many of Checkbox's outputs looks like below.
Many to many: Binary widget added.
Binary widget added (Binary widget useful to give more than 1 one attachments).
Many to one: Selection widget added.
Selection widget added.
Set type as selection and enter options as per requirement, widget set to the radio.
The selection field with "radio" widget added to form.
Priority: This feature added to add a priority view.
The selection field with "priority" widget added to form.
Color field added.
Color field added for a selection of different colors.
Signature field with access rights.
Signature field added.
'Employee Custom Field' & 'Employee Custom Tab' menu in the configuration. where you can see the list of the custom tab & custom fields.
Enable "Employee Leave Notification" in the HRMS configurations.
Assign Work Email to employee, employee will get leave reply on this email. Set Manager of employee, this manager will receive leave request email. e.g Hr Manager.
For Hr Manager set Work Email, he will get leave request on this email. Employee will leave reply from this email.
Leave Request created by Employee.
Hr Manager got leave request email from employee, with leave details mentioned. On "View Leave" button click, he will redirected to that leave request.
Hr Manager can see leave request. He can either approve or refuse request.
On "Approve" button click, leave is approved.
Employee get reply from Hr Manger about leave approval.
If Hr Manager refused any leave.
Employee get email notification about refusal of leave request.
Tick "Enable Automatic Leave Summary" and choose weekly, monthly or both to send leaves email.
Leave request list view with total leaves.
Now we run schedule actions.
As per configuration leave email sent.
Enable "Payslip Cancel Feature".
Option 1: Your Journal Not Allow Cancelling Entries
Currently, the journal has not allowed canceling entries.
Now make payslip and confirm it.
After journal entry is created, you can see a list view of a journal entry.
The journal entry form view looks like below.
Now, In payslip press button "Cancel Payslip".
After cancel payslip than it makes the reversal entry of payslip.
If you cancel payslip that state is set to reject.
A reversal journal entry form view.
Option 2: Your Journal Allow Cancelling Entries
Currently, the journal has allowed canceling entries.
Now make payslip and confirm it.
After journal entry is created, you can see a list view of a journal entry.
The journal entry form view looks like below.
You can cancel the payslip based on the reference number so press button "Cancel Payslip".
Payslip state set to rejected.
We have canceled payslip so it shows journal entry empty.
"Refund Payslip" Field Feature
Now make payslip and confirm it.
Press the button "Refund" in payslip.
Payslip list view.
You can see the "Refunded Payslip" field it shows detail if the payslip is refunded.
Enable "Payslip Send Payslip" in configurations.
After creating a payslip, on the "Confirm" button click, payslip will auto-sent in the email to that employee.
It shows an error if you have not allowed "send payslip" for that employee.
Inside employee set "Send Payslip" to true.
When you press the "Send Email" button, this pop-up will open to sent payslip to an employee., user can modify that template.
You can send multiple payslips to employees at a time from the list view by the "Send Payslip" button.
After that popup opens, press the "Send Email" button.
Payslip sent to the employee.
Payslip looks like this.
Enable "Payslip Dynamic Approval" in configuration.
Approval configuration menu.
Approval Configuration: Setup approval levels based on minimum amount and users level. Also select companies.
Approved Process By, there are two types 1. User , 2. Group. Userwise means to define that person who approved the payslips, in this wizard select the user.
Approve type 2. Group that means only specific groups users will give approval.
User submits payslip for approval by pressing the âConfirmâ button. so that the payslip will automatically set the âWaiting for Approvalâ stage. Auto fetch Approval Level based on configured approvals setup and minimum limit.
After confirmed by the user, Auto set next level approvers in the Approval Info tab. If next approval is required.
Email notification sent to approvers for approval payslip.
The "My Approval" menu shows payslip only those payslips are assigned to him.
Approval Flow
There are 2 approvers the first approver approves the payslip.
After approved by the approved person, Auto set the next level approvers in the Approval Info tab. If next approval is required.
Email notification sent to approvers for approval payslip.
Now the second approver approves the payslip.
So payslip is done.
Email notification sent to approvers for approval payslip.
Rejection Flow
There are 2 approvers If the first approver rejects the payslip that means that payslip will be canceled no more second approver is needed.
After click on the âRejectâ button, this wizard will pop up, here the approver has to add a reason for rejecting the payslip.
After rejection, it auto set the rejection information in the "Reject Order Info".
Email notification of rejection looks like this.
User gets a notification when a payslip approves or rejects.
Enable "Payslip Dynamic Cheque" in configuration.
'Cheque Format' all configuration.
The configuration output looks like below.
'Cheque Format' submenu in the payroll configuration menu and tree view.
'Cheque Format' form view, you can choose fields like,
Print Check Border:
You can configure border width and border color.
Print Partner:
If you select this checkbox then it's a print partner in the cheque. You can configure font (bold, width, color, size) and can configure partner with title and spacing.
Configuration
Output
You can choose fields like,
Print Date:
If you select this then it's a print date in the cheque. Using separator, date & year Format, date spacing you can configure date.
Date Digit From Left:
You can configure using date letter spacing, font size & color.
Amount In Digit:
If you select this then it's a print amount, currency and star in the cheque. You can configure amount spacing, font size & color.
Amount In Words:
If you select this then it's a print amount words & star in the cheque. You can configure font bold, size, color & Spacing.
Configuration
Output
You can choose fields like,
Print Company:
If you select this then it's a print company in the cheque. You can configure company spacing, font size & color.
Print Cheque No:
If you select this then it's a print chequ no in the cheque. You can configure font size & color.
Print Short Code:
If you select this then it's a print short code in the cheque. You can configure font size & color.
Print Bank Address:
If you select this then it's a print bank address in the cheque. You can configure font size & color.
Print Account Number:
If you select this then it's a print account no in the cheque. You can configure font size & color.
Configuration
Output
You can choose fields like,
Print First Signature:
If you select this then it's a print signature in the cheque.
Print Free Text One:
If you select this then it's a print free text one in the cheque. You can configure free text one spacing, font size & color.
Configuration
Output
You can choose fields like,
Print Free Text Two:
If you select this then it's a print free text two in the cheque. You can configure free text two spacing, font size & color.
Print Free Text Three:
If you select this then it's a print free text three in the cheque. You can configure free text three spacing, font size & color.
Extra Information:
If you select this then it's a print payment & journal information in the cheque.
Configuration
Output
Go to Payments and select appropriate Cheque Format,Bank, Employee Title, Add Cheque No, Add free text.
You can edit bank name, id no, logo & address.
You can print a cheque from the "Print" option.
"Payslip Dynamic Cheque" print looks like below.
In "User", enable the "Hr Payroll Whatsapp Feature" option. Users can easily send a message to anyone using that menu. This menu will be visible when the user has the SWQ group enable.
Payroll Whatsapp configuration setting, Here we enable payroll information & report URL in the message.
Send payslip in WhatsApp to the employee.
Edit Message as your requirement and click send.
If the contact number not available then this popup opens.
The payroll WhatsApp message looks like this.
Now we enable signature for show signature in the message.
Set the signature in the message,
1) Go to Preferences.
2) Add Signature.
Now we send payslip in WhatsApp to the employees and edit Message and click send.
The payroll WhatsApp message looks like this.
Tick the checkbox to enable auto-checkout, User can define checkout interval time.
Schedule actions for auto-checkout.
Enable "Write Checkout DateTime Same As Checkin".
Checkout datetime same as checkin.
Overtime configuration for weekdays.
Overtime weekdays list view with an hourly rate.
Overtime configuration for weekend.
Overtime weekend list view with an hourly rate.
Overtime request form view.
Admin approve overtime request.
Now in the payslip select contract.
You can set overtime in the salary structure.
The salary structure with overtime.
The salary computation with overtime.
Now employee send overtime request on weekend.
Weekend overtime request approved by manager.
Salary compute based on configuration.
Payslip with weekend overtime.
Version 17.0.1 |Released on : 25th November 2023
- Initial Release
Is this app compatible with Odoo Community as well as Enterprise?
- No, This app works perfectly with Odoo Community only.
I want some customization in this theme. How can I request it?
- Please Contact Us at sales@cbms.ng to request customization.
Do i get free support?
- Yes, we provide free support for 100 days.
Do i get free updates?
- Yes, you will get free update for lifetime.
Do we need to install any additional libraries/modules for using this module?
- Yes, you need to install external libraries 'pdfminer'
Command : pip3 install pdfminer
Do I have to buy my module for each version?
- Yes, You have to download module for each version (13,14,15) except in version 12 or lower.
What If I purchase Module In Wrong Version Can I exchange Module With Other Versions?
- No, We do not provide any kind of exchange.
If you need suuport please raise your ticket at support@cbms.ng

To install this Web App in your iPhone/iPad press ![]() and then Add to Home Screen.
and then Add to Home Screen.
